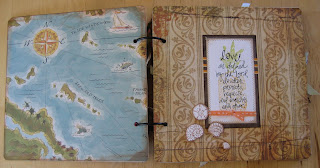
I made this a few months ago for Christmas presents. I made four of them so I could have several gifts for people. The calendar is a little bigger than a card and has magnets on the back to hang up on your frig. The idea was that its there as a reminder of what day it is and something cute to hang on your frig! Enjoy.
Showing posts with label Scrapbooking. Show all posts
Tuesday, December 23, 2008
mini calendar
I made this a few months ago for Christmas presents. I made four of them so I could have several gifts for people. The calendar is a little bigger than a card and has magnets on the back to hang up on your frig. The idea was that its there as a reminder of what day it is and something cute to hang on your frig! Enjoy.
Thursday, August 21, 2008
Cutest paper on the block{s}
- I bought a 4x4 thing of wood (which isn't a true 4x4...its actually 3 3/4...lame)
- Cut them to be true squares
- Sand all the edges and corners (an electric sander is faster)
- Paint all of them edges and corners brown (or whatever color you prefer)
- Mod-Podge paper with a sponge brush on all sides and there you go! (Less mod-podge is better...then that prevents bubbles on the paper surface
- the letters I traced and cut out and then mod-podged on!
Thursday, August 7, 2008
Wall Art
Thursday, July 31, 2008
Itinerary
Guest Sign-In
A few key points:
the scrapbook is 8 1/2 x 8 1/2
I sewed all of the paper (the ones with the letters on them) to the background sheet and then spray glued the pages together.
The cover I pretty much sewed everything on.
The word "together" on the cover is my handwritting.
I used mounting tape on some of the elements on the cover to give it dimension.
Most of the paper I used is Basic Grey...I have found with themed scrapbooks that it always looks more cohesive and complete when the paper and embellishments match!
Tuesday, July 29, 2008
Step 2: Signs and favors
I made these signs with the intention that my mom can scrapbook them later. One of my goals with this party was to have it run itself. This helps a lot when you have the proper signage. No one had to stand at the door to answer it because the sign did it for us! Two commonalities in all of these signs:
1. They all are framed with layers of paper in different colors
2. I distress EVERYTHING!!!!
This Aloha sign is made from two 12 x 12 sheets of paper. I first made a pattern no scatch paper and then traced it onto the real paper. And as you can see I did layers. It always looks so much better when you frame what you are doing. The letters for Aloha I designed on scratch paper first and then cut out each letter in two different colors to shadow.
I am totally loving my handwritting after reading that handwritting book. It's so fun to play and see what I can come up with.
I love this sign. It took a long time to make, but it was worth it. The letters are from stamps and the 25 is my desing. I used eyelets to lace the three pieces together.


I made a place where I hung pictures of my parents wedding for people to look at! And the other sign went above the guest sign in table.
I placed this sign above the favors as people were leaving.
I love these favors. Chocolate covered raisins. And the "k" is for Kenning(my parents last name). These were so fun to make and cheap too!
1. They all are framed with layers of paper in different colors
2. I distress EVERYTHING!!!!
I made a place where I hung pictures of my parents wedding for people to look at! And the other sign went above the guest sign in table.
Monday, June 16, 2008
Top 10 Reasons Why I Love My Daddy
Alright, so here is Paul's Father's Day present. It's a top ten count down book of why Evie loves her Daddy. It is a 6x6 album, made from cardstock. I first picked my pictures for each reason, put them together with the page & picked a picture or two, then made a space for the number & last I made the textbox the size I needed to fit. Then I sanded & distressed the pictures & wording. I used BasicGray chipboard letters & numbers which I covered in different green Bazzill to match the paper. I sanded & distressed each of them. Then I zig-zagged the writing and straight stitched the number squares in a pretty green thread. Then I made him a matching card to go in the last page, which I made into a pocket, so he can always keep the card together. Then I backed the pages with each other and stitched around edges to make it more sturdy. And last, I tied on some brown colors of hemp and "man-ribbon" on the rings. I love how the brown & green colors all went together so well!
Album cover
Dedication & Reason 10
#9 & 8
#7 & 6
#5 & 4
#3 & 2
#1 & pocket page
Father's Day card
Album back
Subscribe to:
Posts (Atom)