Wednesday, July 8, 2009

Diaper Carriers

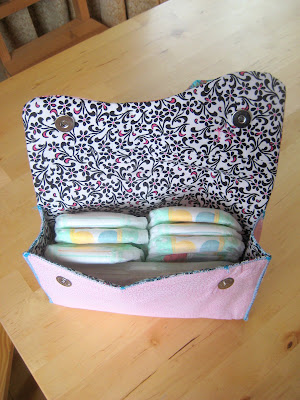
They're here! I've made a few diaper carriers for ya'lls choosin'. They're going fast, so grab 'em quick! I love the fabrics that I chose...so fresh and colorful! More colors coming soon....

Again, if you are interested, please email at
nickihoxie@gmail.com

Each diaper carrier is $30 (plus $3 shipping) unless your in the California East Bay, to which you can pick yours up!

**I really took the time and care to make sure each one is made well and sturdy! Enjoy!


The below pictures are of previous diaper carriers that are no longer available...If you are interested in purchasing one, we can discuss what colors you would like, and I'll make you one!!

Photobucket
Amy Diaper Carrier

Lila Diaper Carrier


Sawyer Diaper Carrier

{This one is no longer available....Just wanted to show with diapers!}

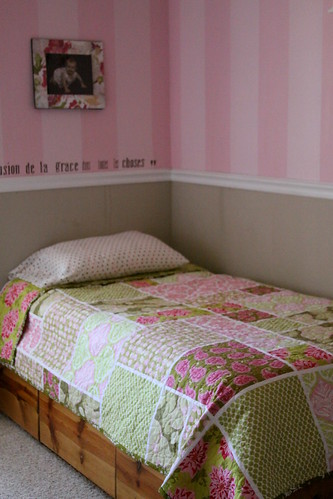
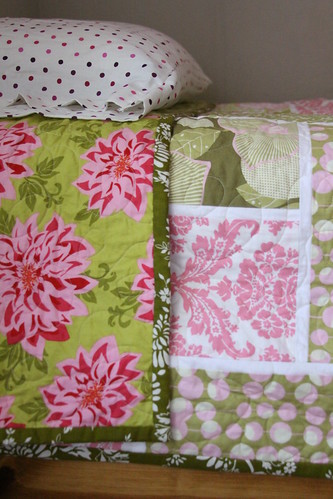
Miss T's glorious quilt!

When I found I was pregnant, I wanted to make something grand for my miss tessa so that she felt special. It's taken me a few months to get exactly what I want. I bought the cutest Amy Bulter and Grand Revival fabrics at my favorite local quilt shop a while back.


I went in the shop with one idea...saw a quilt hanging up on the wall for display and decided to change my plans and do the one I saw. I took a pic of it, bought 1 1/2 yards of 7 different fabrics. I went home and made a pattern!
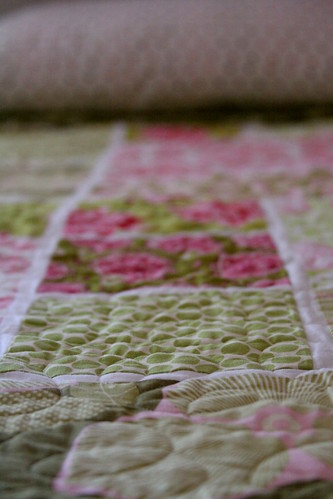
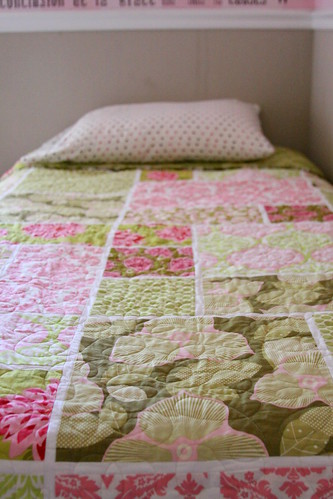
After piecing the top and back, and buying the batting, I took it to a quilting store in Utah when I was visiting family and got it professionally quilted. I LOVE how it turned out. And then all I had to do was bind the edges! The quilt it MUCH bigger than I originally planned, but I don't care. It'll just grow with her! The finished quilt is 76 x 94....it almost fits a stinkin' queen!

Here is the finished product:


I love the quilt pattern that I chose. It was a penny per square inch....not bad!


Monday, June 29, 2009

handmade jewelry

My friend Paige makes the cutest handmade jewelry called Tiny's Trinkets. She has everything from necklaces, to bracelets, necklaces for little girls, earrings and my favorite, the mother's necklace that you can get engraved! Her products are very well made and are truly beautiful! To check out her website, click here.

Sunday, June 21, 2009

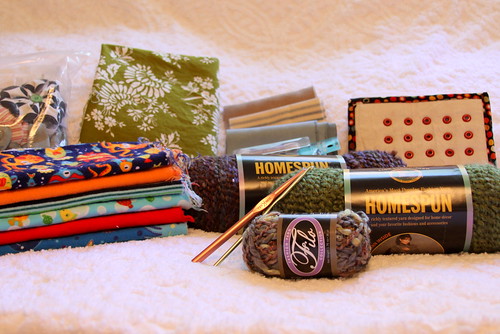
Up and Coming


One of the beauty's about visiting my parents in Utah is all of the wonderful deals and great selection for pretty much everything. I have been to several fabric stores, Roberts, and have a few more places on the list to visit....Here are a few items that I can't wait to show their finished creations!

Saturday, June 20, 2009

Diaper Carriers for sell.....

I have to say that when I made the first one, I didn't ever imagine I'd get so many people interested in them! I have a baby on the way, I am excited to make myself one!

Purchase info:

I currently don't have any made, so you can tell me what colors you would like, and we can go from there.

Allow for a couple of days to make it and time for shipping...so around 1 to 2 weeks...And if you are local (East Bay, CA) shipping is obviously free if you pick it up!

I'm selling them for $22. (plus $3 shipping)

So total is $25.

If you are interested, please shoot me an email

nickikhoxie@gamil.com

and we can get creative with your unique one-of-a-kind diaper carrier!

Thanks to everyone interested...

Wednesday, June 17, 2009

Hooded Baby Towels

One of my standard baby shower gifts is a hooded towel. Not the little tiny ones that fit them for the first week of their life, but a big, soft, over-sized, cushy one to wrap your little ones up in and keep them warm. I always like to embellish mine just a little bit-- whether that be to coordinate with their room or bathroom colors. I even decorate the boys towels with "manly ribbon." I haven't gotten into decorating the towels as animals yet, but I might in the future. These are just so quick and easy, but I'm sure I'll try it out sometime soon.


Just a few finished hoodies, my favorite is the chocolate brown with baby pink ladybug hoodie.


All folded up nice and neat, ready to wrap up.


Laid out so you can see the front details.


Hanging up so you can see the back details.


Here is a boy's hoodie.


The inside of the "hoodie" part.


Detailing on the top of the hoodie part for a boy.


I have included two tutorials that I have generally based my hooded towel off of. Since I'm not a huge fan of doing tutorials, these will have to do. Let's face it, there's would be better than mine anyways, right?

http://www.skiptomylou.org/2007/11/29/hooded-towel-tutorial/

http://www.instructables.com/id/Hooded-Baby-Towel/?download=pdf


1 large bath towel

1 hand towel

Coordinating ribbon


Cut your hand towel in exactly half widthwise.


Discard or save the other half of the hand towel for a future hooded towel.


I always stitch a little bit of ribbon or ric-rac along the front ribbing of the towel for some added decoration and to up the cuteness factor. You can press it on with a little bit of stich-wichery if you’d like first to hold it in place before you stitch the ribbon on straight.


Fold the cut hand towel in half, right sides together. Now measure 3” or 4” over on the top half folded side on each side and mark with a pin. Draw a line with a pencil from the marked spot with the pin all the way down to the bottom corner, on each side. This will make a sort-of upside down right triangle. Now stitch along this line. Turn right side out and the hood is done.


Fold the bath towel in half, wrong sides together.


Measure over 4 inches from the fold and 4 inches down from the top and stitch. You should have just sewn a 4” straight line.


Open bath towel and lay flat. Flatten the tuck. I always baste this across the top to keep it in place for the next step.


Now lay your bath towel flat on the floor with the right side on top. Now take your hood, turn it upside down and lay it on the top edge of your bath towel, with top of hood facing up. Line up exact center of hood and exact center of towel and pin together. Stitch from one side edge of the hood to the other side edge of the hood, connecting it to the edge of the bath towel. Go back along the same line and zig-zag stitch across the length to secure the stitch.

Thursday, June 11, 2009

flower it up!

So here are some new creations that I'm really excited about! I've been playing around with hair bows/flowers for a long time now and I feel like these are the cutest things I've come up with!

So here are a couple of samples of ones I've made so far...many more to come. And I'm thinkin' if ya'll are interested, a giveaway might be coming up! I'm also thinking about selling them too, if anyone is interested...Let me know what you all think!


This one is an "adult" one that I made for a friend....The one above is a little bigger and looks cuter on a little girl!


These bottom two I made for babies/little girls. So precious!

yellow diaper carrier

*I really need to come up with cuter titles....sorry for the boringness

Another one sold! Thanks Melissa for taking interest in my crafting. You're the best!


diaper carrier measurements: 10 x 6.5 x 2.5 inches

Friday, May 29, 2009

Sold!

Thanks to the lovely ladies who were interested in my diaper carriers.....2 sold! I really like how colorful and bright they turned out! Enjoy :)


Tuesday, May 26, 2009

circle quilt #2


i made this quilt for my good friend Shannon who is having a baby boy in July. I love the fabric that I chose and it conveniently matches the baby's nursery! The quilt it approx. 38"x45"...a perfect baby size blankey! I constructed this quilt the same way i did the first circle quilt i made. The only difference is instead of doing swirls for the quilting part, i simply sewed around each circle and then around the borders where the seems were. I love how it turned out!